A character looks right in the first clip, then gets a different jacket in the next one. Reference photos can help—but you still need to tell the tool which details to keep.
This guide uses a fictional pocket recorder called Pebble as a simple example: one orange button, a circular speaker grille, and a dark wrist loop. We want those details to survive a move from a desk to an outdoor scene.
A reference photo isn’t always the first frame
xAI’s documentation separates pictures that guide a subject’s appearance from controls that pin an exact first or last frame, in supported models.
Use a reference when you want the same recorder in a new setting. Use a first-frame control when you’ve already approved the exact opening picture. A generic upload button doesn’t necessarily do both.
A Reference Photo and a First Frame Do Different Jobs
Select the documented input that matches the desired kind of control.
- Subject referenceIdentity
Guide a known subject in a new composition.
- Appearance is the requested constraint
- Opening composition may be generated
- Support depends on model and mode
- First / last frameAnchor
Constrain a specific endpoint when supported.
- Approved composition matters
- Check combination rules
- Intermediate motion still needs review
- Existing-video taskFootage
Edit or continue an existing moving source.
- Different job from subject casting
- Check the correct endpoint
- Do not treat uploads as interchangeable
Method note. Input behavior depends on the model and mode. No consistency ranking is implied.
Based on the linked official guides, checked .
Replacing a person inside existing footage or copying another video’s motion is a different job again. Check that the selected mode actually supports the change you want.
Choose photos that answer a specific question
Start with a clean front view. Add a side view if the next shot will show the side. Ten almost identical pictures won’t explain the back of the object.
Here’s a small reference list you can copy for your own project:
| File | Use it for | Keep this | Allow this to change |
|---|---|---|---|
| Pebble front | Product appearance | Button, grille, proportions | Lighting |
| Pebble side | Side details | Wrist-loop attachment | Camera angle |
| Desk scene | Setting | Desk and lamp | Recorder position |
| Outdoor scene | New setting | Ground and vegetation | Light |
| Approved opener | Exact opening, if supported | Framing and placement | Later movement |
Keep the file version and permission notes beside the images. Don’t mix a prototype with the final design: if one picture has two buttons and another has one, settle that before generating.
You can prepare a matching still first
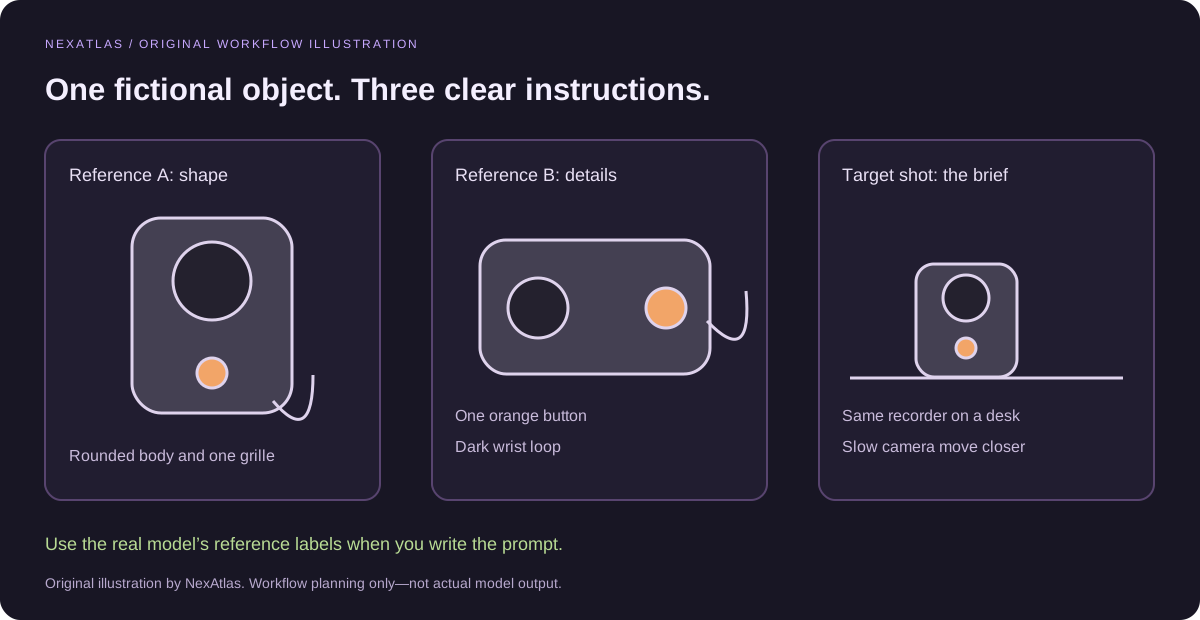 Open full size ↗
A fictional recorder illustrates the job of each reference. These are planned constraints, not actual model-generated frames.
Original illustration by NexAtlas. Workflow planning only—not actual model output.
The original recorder diagram separates appearance, details, and the next shot. The official USO tutorial offers a documented still-image route with separate subject and style inputs. That is an image-preparation step, not video generation, and its model license still needs checking.
If your video tool needs an approved starting image, finish that image first. Otherwise, use its documented reference-video mode and let it compose the new shot.
Check the model before filling every upload slot
The xAI page lists up to 14 reference images for grok-imagine-video-1.5, versus 7 for grok-imagine-video. These are different versions, not quality scores. Its preset voice references also aren’t the same as unrestricted uploads for voice cloning.
Check these points in the tool you’re using:
- The exact model and generation mode.
- Which image, video, or audio inputs it accepts.
- How it labels each reference.
- Whether it can combine references with first/last-frame inputs.
- Whether the feature is available in your interface, not just an API.
- The current quote and usage rights.
Keep file names and input labels in sync
In xAI’s documented request, adding an explicit first-frame image can shift reference-image numbering. Save the mapping with the prompt so it still points at the right picture.
Your folder might call a file Pebble front, while the tool calls it Image 2. Record that connection. Reordering the uploads without changing the prompt can point a perfectly clear instruction at the wrong object.
Save references you will need again
Runway’s reference guide distinguishes temporary uploads from named, saved references and workspace sharing. Available media types still depend on the model.
Keep your own original files too. Check that your collaborator can access the same version, rather than assuming a reference from yesterday’s session will still be there.
Write the action for the new shot
For Pebble, a draft could be:
Use the recorder references for the device. Place it on the desk beside the closed notebook. The camera moves slowly closer while the recorder stays on the desk. Soft window light.
Replace those descriptions with the labels your tool actually uses. For the outdoor shot, change the setting without accidentally keeping the old desk instructions.
Venice’s official walkthrough separates character/object elements, scenes, and frame controls, then takes the clips through editing and export. The section below starts with those reference controls.
- The official walkthrough separates character/object elements from scene references.
- The selected section starts at 4:21. First and last frames are separate controls.
Watch on YouTube ↗ · Official walkthrough. Loads after your click and starts muted. YouTube’s privacy rules then apply. Use the player controls to turn on sound.
Check more than the opening thumbnail
Watch the subject as it turns, moves, and reappears after being hidden. For our recorder, compare the body shape, orange button, grille, and wrist loop. Similar color alone isn’t enough.
Keep the Right References with Each Shot
The fictional Pebble recorder exercise connects assets to review decisions.
- 01AssignOne role
Product, side view, scene, or exact opening frame.
- 02MapLabels
Record how your file names map to the selected model inputs.
- 03ReviewDetails
Inspect silhouette, controls, occlusion, and each new angle.
Method note. Use the role sheet for your own project; fill in results after watching actual footage.
Based on the linked official guides, checked .
| Shot | Look closely at | Allowed change |
|---|---|---|
| Desk introduction | One button and the same body shape | Indoor lighting |
| Outdoor detail | Loop and grille placement | Background and angle |
| Closing insert | Front control layout | Tighter framing |
Fill in your own keep/reject notes after watching actual footage. For exact logos or lettering, plan a controlled graphic treatment rather than accepting something that merely looks close.
Fix the part that’s wrong
- Wrong asset label? Correct the mapping.
- Conflicting designs? Fix the reference set.
- Details change during a large turn? Try a smaller turn or supply the needed view.
- Only the ending fails? See whether you can trim it without losing the action.
Save the chosen clip, useful time range, prompt, files, model, settings, and charge together. The next shot will be much easier to pick up. Use the prompt revision log and long-video workflow for the next steps.
Quick questions
Do more references always help?
No. Add a file because it shows needed information, not because an upload slot is empty. Extra files can introduce conflicting versions or unwanted backgrounds.
Is uploading a reference the same as training?
Don’t assume that it is. Reference inputs and fine-tuning are separate features. Check the provider’s data-use terms; this guide doesn’t promise how every service handles uploads.
Can I use words instead of photos?
Google’s best-practices guide recommends reusing a detailed character description for relevant text-led scenes. That doesn’t conflict with motion-focused prompting for a supplied first image—the picture is already carrying the appearance.
Can I use someone’s face or a branded product?
Get the necessary permission and check the service’s rules. An upload feature doesn’t grant rights to the material. For a small project budget, see the separate $30 short-film guide.
Sources and method notes
Sources checked November 2, 2026. Media credits and licenses appear with each item.