You have a drawing. Do you want to watch its ink lines move, or turn its rough layout into a finished scene? Those are two different jobs—and choosing early saves confusion later.
Pick the look you want
Keep the drawing style
Use the artwork as your starting image. Begin with a small movement: a blink, a tilting lamp shade, or clouds passing behind a building. A large turn makes the model invent sides you haven’t drawn.
Kling’s sketch page describes starting from a drawing and guiding motion with text. It also acknowledges that details can change. Don’t expect exact line-by-line preservation.
Turn the sketch into a new scene
Flick’s documented workflow first turns the sketch into a finished image, then animates that image. The sketch supplies the layout; a character reference can supply appearance. Its example connects an Edit & Merge Images node to Image to Video.
Approve the still before paying for movement. If the lamp is already on the wrong side of the desk, video generation won’t make that layout a good choice.
Keep the Drawing—or Make a New Scene
Decide whether the line work is the artwork or a plan for new artwork.
- Route A · Preserve drawing styleAnimate
Clean sketch → image-to-video → review.
- Line style is an acceptance criterion
- Begin with a readable motion
- Check the whole clip, not its thumbnail
- Route B · Render a new sceneRebuild
Sketch + references → approved still → video.
- Layout can stay while materials change
- Approve the intermediate frame
- Pay for motion after composition review
Method note. Two documented routes. These cards explain the steps; they are not generated results.
Based on the linked official guides, checked .
Try a simple drawing first
Here is our original lamp-and-note sketch. The lamp sits on the left, the folded note on the right. For this planning exercise, the lamp shade tilts down while the base stays on the desk.
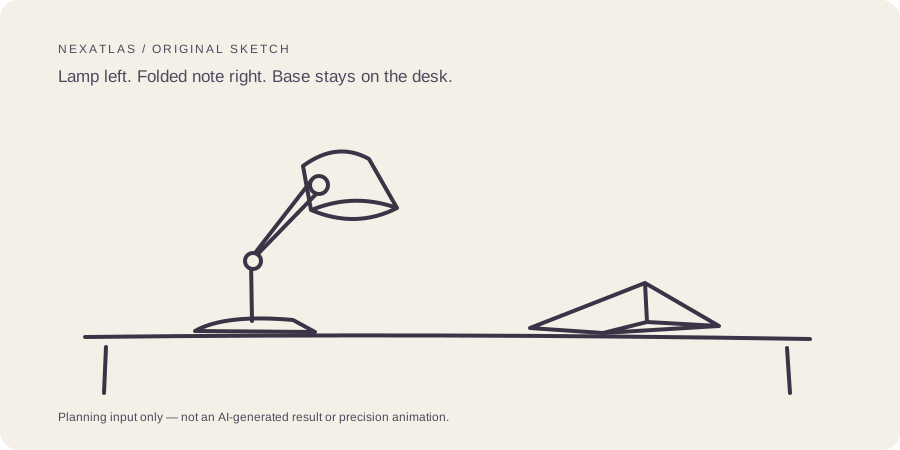
Before generating, decide what must survive:
- The lamp and note stay in their places.
- The base touches the desk.
- The shade turns at the joint instead of bending.
- The note stays folded.
Keep an untouched copy of your drawing. Export a separate working file so you can undo cropping or contrast changes.
Prepare the file without confusing the model
Kapwing’s sketch guide explains both using a sketch as a layout and adding visual annotations with a text explanation. That doesn’t make arrows a universal instruction format for every video model.
Keep a clean image for generation and a marked-up copy for planning. If a tool supports annotated inputs, explain what the marks mean. Otherwise an arrow could become part of the scene.
Runway accepts JPEG, PNG, and WebP image inputs, but not GIF images. Other tools have their own requirements. Check file size, crop, and transparency handling before starting.
Route A: make the drawing move
- Open a supported image-to-video mode and upload the clean drawing.
- Check the crop, especially hands, feet, object bases, and other contact points.
- Describe the main movement and the style you want to keep.
- Choose a supported draft length, generate, and watch the whole clip.
For our lamp, an example instruction is:
The lamp shade tilts slowly downward at its joint. The base rests on the desk. The camera stays still. Keep the simple ink-drawing style.
Runway’s image-to-video advice warns that movement suggested by the picture can fight the text. If the drawing already looks like it’s falling over, fix that pose rather than adding more words asking for stillness.
If every technical edge must stay exact, keyframed animation or a controlled 3D setup may suit the job better.
Route B: make a good still, then animate it
Decide how the finished scene should look: perhaps a matte desk lamp and paper note in a softly lit room. Use the sketch for placement and separate references for the subject or style.
 Open full size ↗
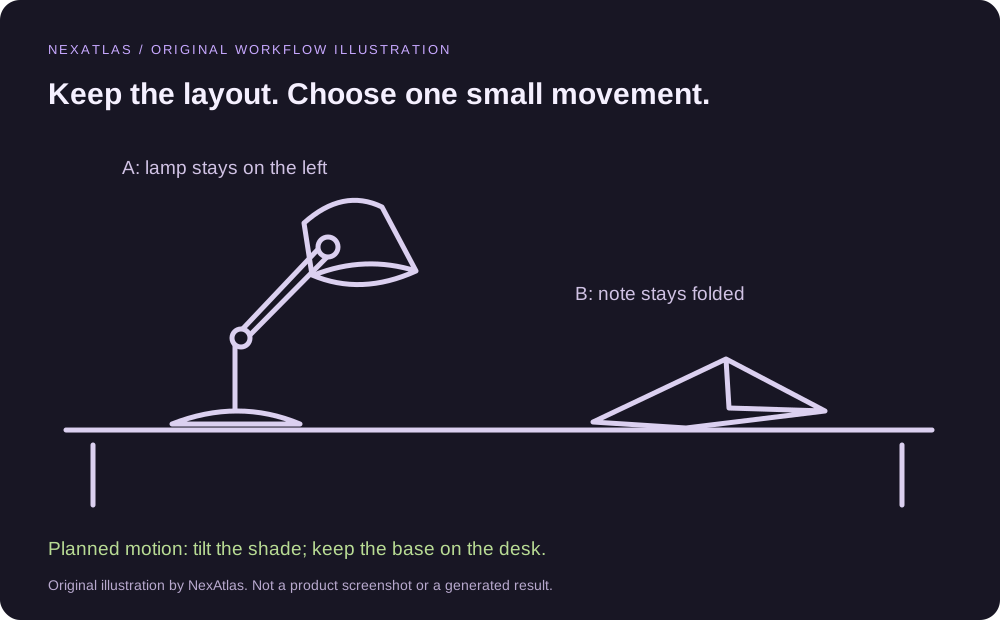
Plan the position and one small movement before choosing a model. This is a workflow illustration, not a product screenshot or an AI output.
Original illustration by NexAtlas. Workflow planning only—not actual model output.
- Load the drawing as the guide image.
- Check the still before sending it to a video model.
- Keep the image-stage and video-stage licenses separate.
The original illustration above shows the layout to preserve. For a documented ComfyUI still-image route, the official tutorial loads a drawing through Load Image and applies the matching Scribble control model. It’s one way to prepare a frame; the video stage comes afterwards.
Once the still looks right, send that approved image to your chosen image-to-video workflow. Check the still’s proportions and placement before adding motion.
| Before moving on | Look for |
|---|---|
| Drawing | Clear subject and uncropped contact points |
| Finished still | Right objects, style, and placement |
| Video | Plausible movement and a useful ending |
For more technical control, NVIDIA’s overview describes a 3D-layout, depth-guided image, first/last-frame video, and upscaling pipeline. Its hardware requirements belong to that setup. Its FLUX.1 image stage also has a non-commercial-use warning unless separately licensed.
If the result changes your drawing
Check the Still Before Paying for Motion
Return to the first failing stage rather than restarting every stage.
- 01InputLayout
Readable outlines, uncropped contact points, clean render input.
- 02Still, if usedIdentity
Check the intended objects, appearance, and placement.
- 03VideoMotion
Inspect the joint, occlusions, background, and final pose.
Method note. Use the middle step only when you make a new still first. The lamp exercise is illustrative.
Based on the linked official guides, checked .
Go back to the first place things went wrong:
- Wrong layout in the still? Fix the still before making another video.
- Face or object changes during a turn? Try a smaller turn or a clearer view of that side.
- Camera moves when it shouldn’t? Change that instruction and keep the source image the same.
- The ending falls apart? Trim it if the remaining action still tells the story.
Judge against your chosen route. A realistic lamp may be a good result when you’re rebuilding a scene, but a poor result when you wanted moving ink lines.
Make the next shot—and count the whole cost
Export storyboard panels separately unless the tool explicitly handles a multi-panel sheet. Give each shot one job, and reuse the same approved character or product references. See reference-to-video and building a longer edit.
Flick’s page separates its image-stage trial from paid access to the video models in its examples. A free still doesn’t mean a free finished clip. Check the current full payment, credits, export conditions, and rights; this guide doesn’t quote a new plan price.
Keep image attempts and video attempts separate in your notes. Our video cost guide explains how retries and discarded footage change the bill.
Quick questions
Do I need to draw well?
For layout, clear positions and shapes matter more than polished artwork. If the drawing itself is the finished look, its line quality matters more.
Can I get an exact mechanical animation?
These sources don’t establish that guarantee. Check generated motion against the actual mechanism, or use a more controlled animation method.
Can I use it for client work?
Check the drawing’s rights, the service and model terms, and any image-generation stage. A commercial editor doesn’t automatically license every connected model.
Sources and method notes
Sources checked November 2, 2026. Media credits and licenses appear with each item.